【Unity】ワンショットイベント覚書【Timeline】
はじめに
久々に Timeline でイベントを発行するにあたって、すっかり忘れていたのでメモ。
マーカーを置ける状態にする

タイムライン上の Timeline Makers を有効にしてマーカーを置ける状態にします。
エディッタ上だけで済ませる方法
Signal Emitter を置いていく
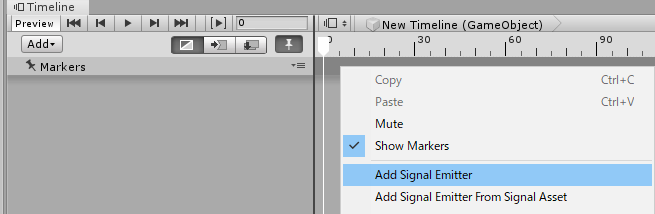
コンテキストメニューから Add Signal Emitter を選択すると デフォルトの Emitter が置けるので、イベントを発生させたいところに置いていきます、
Sigmal Asset を保存する
置いただけでは何もしてくれないので、Signal Amitter Asset (マーカ自身)を保存します。
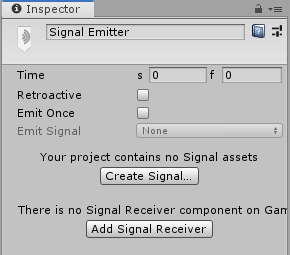
Create Signal… ボタンから保存先を指定して Asset を作成します。
イベントを登録する
Add Sigmal Receiver ボタンを押すと よく見る Unity の Event を追加する テーブルが出るので こいつに追加すると呼ばれるようになります。
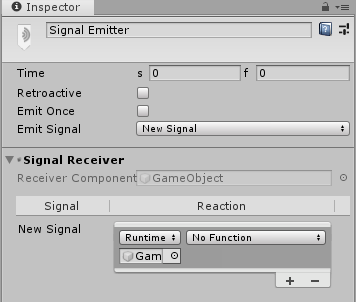
正直まどろっこしいです。ユニークなSignal を追加するたびに Signal Asset ファイルが増えていくので、自分には合わなかったです。
もっと良い方法があるやもしれません。
Timeline.Marker INotification を利用する方法
こちらはプログラマー的には使いやすいです。
タイムラインに置けるMaker のスクリプトを書く
using System;
using System.ComponentModel;
using UnityEngine;
using UnityEngine.Playables;
using UnityEngine.Timeline;

[System.Serializable, DisplayName( "NotificationTestMaker")]
public class NotificationTestMaker : UnityEngine.Timeline.Marker , INotification , INotificationOptionProvider
{
	//----------------------------------------------------------------------------
	// UnityEngine.Playables.INotification.id 実装
	public PropertyName id => new PropertyName( string.Empty);
	//----------------------------------------------------------------------------
	// UnityEngine.Timeline.INotificationOptionProvider.flags 実装
	NotificationFlags INotificationOptionProvider.flags =>
		NotificationFlags.TriggerInEditMode // このフラグを使用して、編集モードで通知を送信します。
		| NotificationFlags.Retroactive; // 通知時間後に再生が開始された場合に通知を送信するには、このフラグを使用します。
//		| NotificationFlags.TriggerOnce; // このフラグを使用して、ループ時に一度だけ通知を送信します。

	//----------------------------------------------------------------------------
	// ここから下は好きに実装可能
	[SerializeField]
	private string m_Text;
	//----------------------------------------------------------------------------
	public string Text{ get{ return m_Text;} }

} // class NotificationTestMaker
デフォルトの Timeline.Maker を拡張します。
UnityEngine.Timeline.Marker を継承し
[System.Serializable, DisplayName( "NotificationTestMaker")]を定義することで、タイムラインのコンテキストメニューから 独自マーカーを定義できます。
INotificationOptionProvider は継承しなくても動作します。
定義することで Maker の挙動を制御できます。
コードにコメントで書いてますが リファレンス から拝借すると
- Retroactive 通知時間後に再生が開始された場合に通知を送信するには、このフラグを使用します。
- TriggerInEditMode このフラグを使用して、編集モードで通知を送信します。
- TriggerOnce このフラグを使用して、ループ時に一度だけ通知を送信します。
となります。
タイムラインに配置
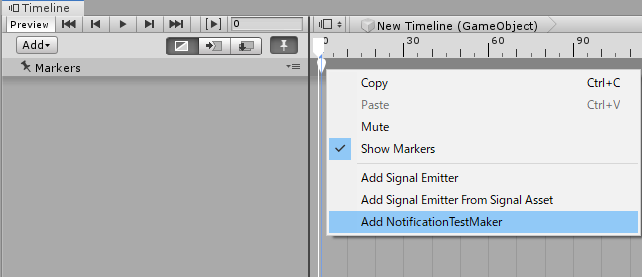
コンテキストメニューから 先程定義した
[System.Serializable, DisplayName( "NotificationTestMaker")]DisplayName 名で配置できます。
Makerに情報を定義する
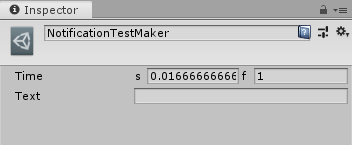
[SerializeField]
private string m_Text;
などシリアライゼーションしたメンバに マーカーごとに設定できます。
シリアライゼーションできる物は大抵のものが対応できますが、Timeline の癖のようなものがあり アセット化されてない GameObject や PlayableDirectorなど シーン上にあり 実行するまで確定しないもの は一工夫必要です。
[SerializeField]
private ExposedReference<PlayableDirector> m_NextDirector;
[SerializeField]
private ExposedReference<GameObject> m_TargetObject;
このように UnityEngine.ExposedReference<T> 使って定義します。
詳細は長くなるので省きますが、エディット中はまだフワッとした存在だけど GameObjectクラスらしく 実行したらわかるよ。みたいな。
これで プレハブせずとも GameObject や別の PlayableDirector オブジェクトを設定できます。
受信側の設定
受信側のスクリプトになります。
using System;
using UnityEngine;
using UnityEngine.Playables;

[RequireComponent( typeof( UnityEngine.Playables.PlayableDirector))]
public class NotificationReceiverTest : MonoBehaviour , UnityEngine.Playables.INotificationReceiver
{
	//----------------------------------------------------------------------------
	// シグナル受信
	public void OnNotify(
		UnityEngine.Playables.Playable origin,
		UnityEngine.Playables.INotification notification,
		object context
	)
	{
		switch( notification)
		{
			case NotificationTestMaker maker:
			{
				var time = UnityEngine.Playables.PlayableExtensions.GetTime( origin);
				UnityEngine.Debug.Log( $"{time} {maker.Text}");
				break;
			}
		}
	}
} // class NotificationReceiverTest
UnityEngine.Playables.INotificationReceiverを継承することで OnNotify に シグナルが飛んでくるようになります。
これを今回は switch の 新機能 型による分岐 で振り分けます。
Maker クラスを増やした際はこちらに追加します。
[RequireComponent( typeof( UnityEngine.Playables.PlayableDirector))]RequireComponent は 設定されているコンポーネントがアタッチされているのを保証するものです。今回は PlayableDirector がアタッチされてないなら OnNotify が呼ばれないため追加しています。
このサンプルコードでは NotificationTestMaker クラスだったら タイムライン上に時間と 設定したテキストをログに吐き出しています。
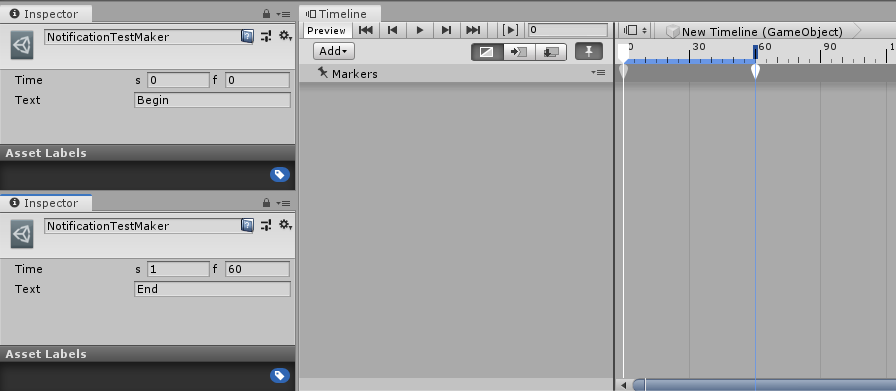
仮にこのようなタイムラインを作って 最初と最後に 独自 Maker を設定し それぞれ Begin End とテキストを設定し、走らせると
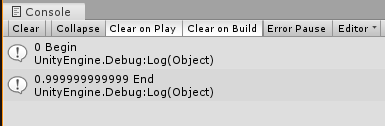
ちゃんとシグナルを受信できていることがわかります。
時間は 0.9999999~ と完璧な 1.0 では無いですが、誤差の範囲内です。
0.0166 以内の誤差なら許す!
応用としては
- 別のシーンに飛ばす
- 別の PlayableDirector に委託する
- エフェクトを出す
- ジングルを鳴らす
- Luaを走らせる
など PlayableBehaviour では面倒だった部分を請け負えると思います。
最後に
2018 の preview の頃は Maker などはなく わざわざ PlayableAsset PlayableBehaviour 作って対応していたので、だいぶ楽になったと思います。